
Repository: rllm-org/rllm-ui
Getting started
There are two ways to access rLLM UI:- Cloud — Use our hosted service at ui.rllm-project.com (see below).
- Self-hosted — Run locally from the repository (see below).
Cloud setup
1
Run rllm login
Run
rllm login in your terminal.2
Sign up
Sign up at ui.rllm-project.com.
3
Copy your API key
Copy your API key (shown once at registration) and paste it in the terminal (or save it as
RLLM_API_KEY in .env).The observability AI agent can be enabled by adding your
ANTHROPIC_API_KEY in the Settings page in the UI — no extra configuration needed.Self-hosted setup
http://localhost:5173 (or the port shown in the Vite output).
Database
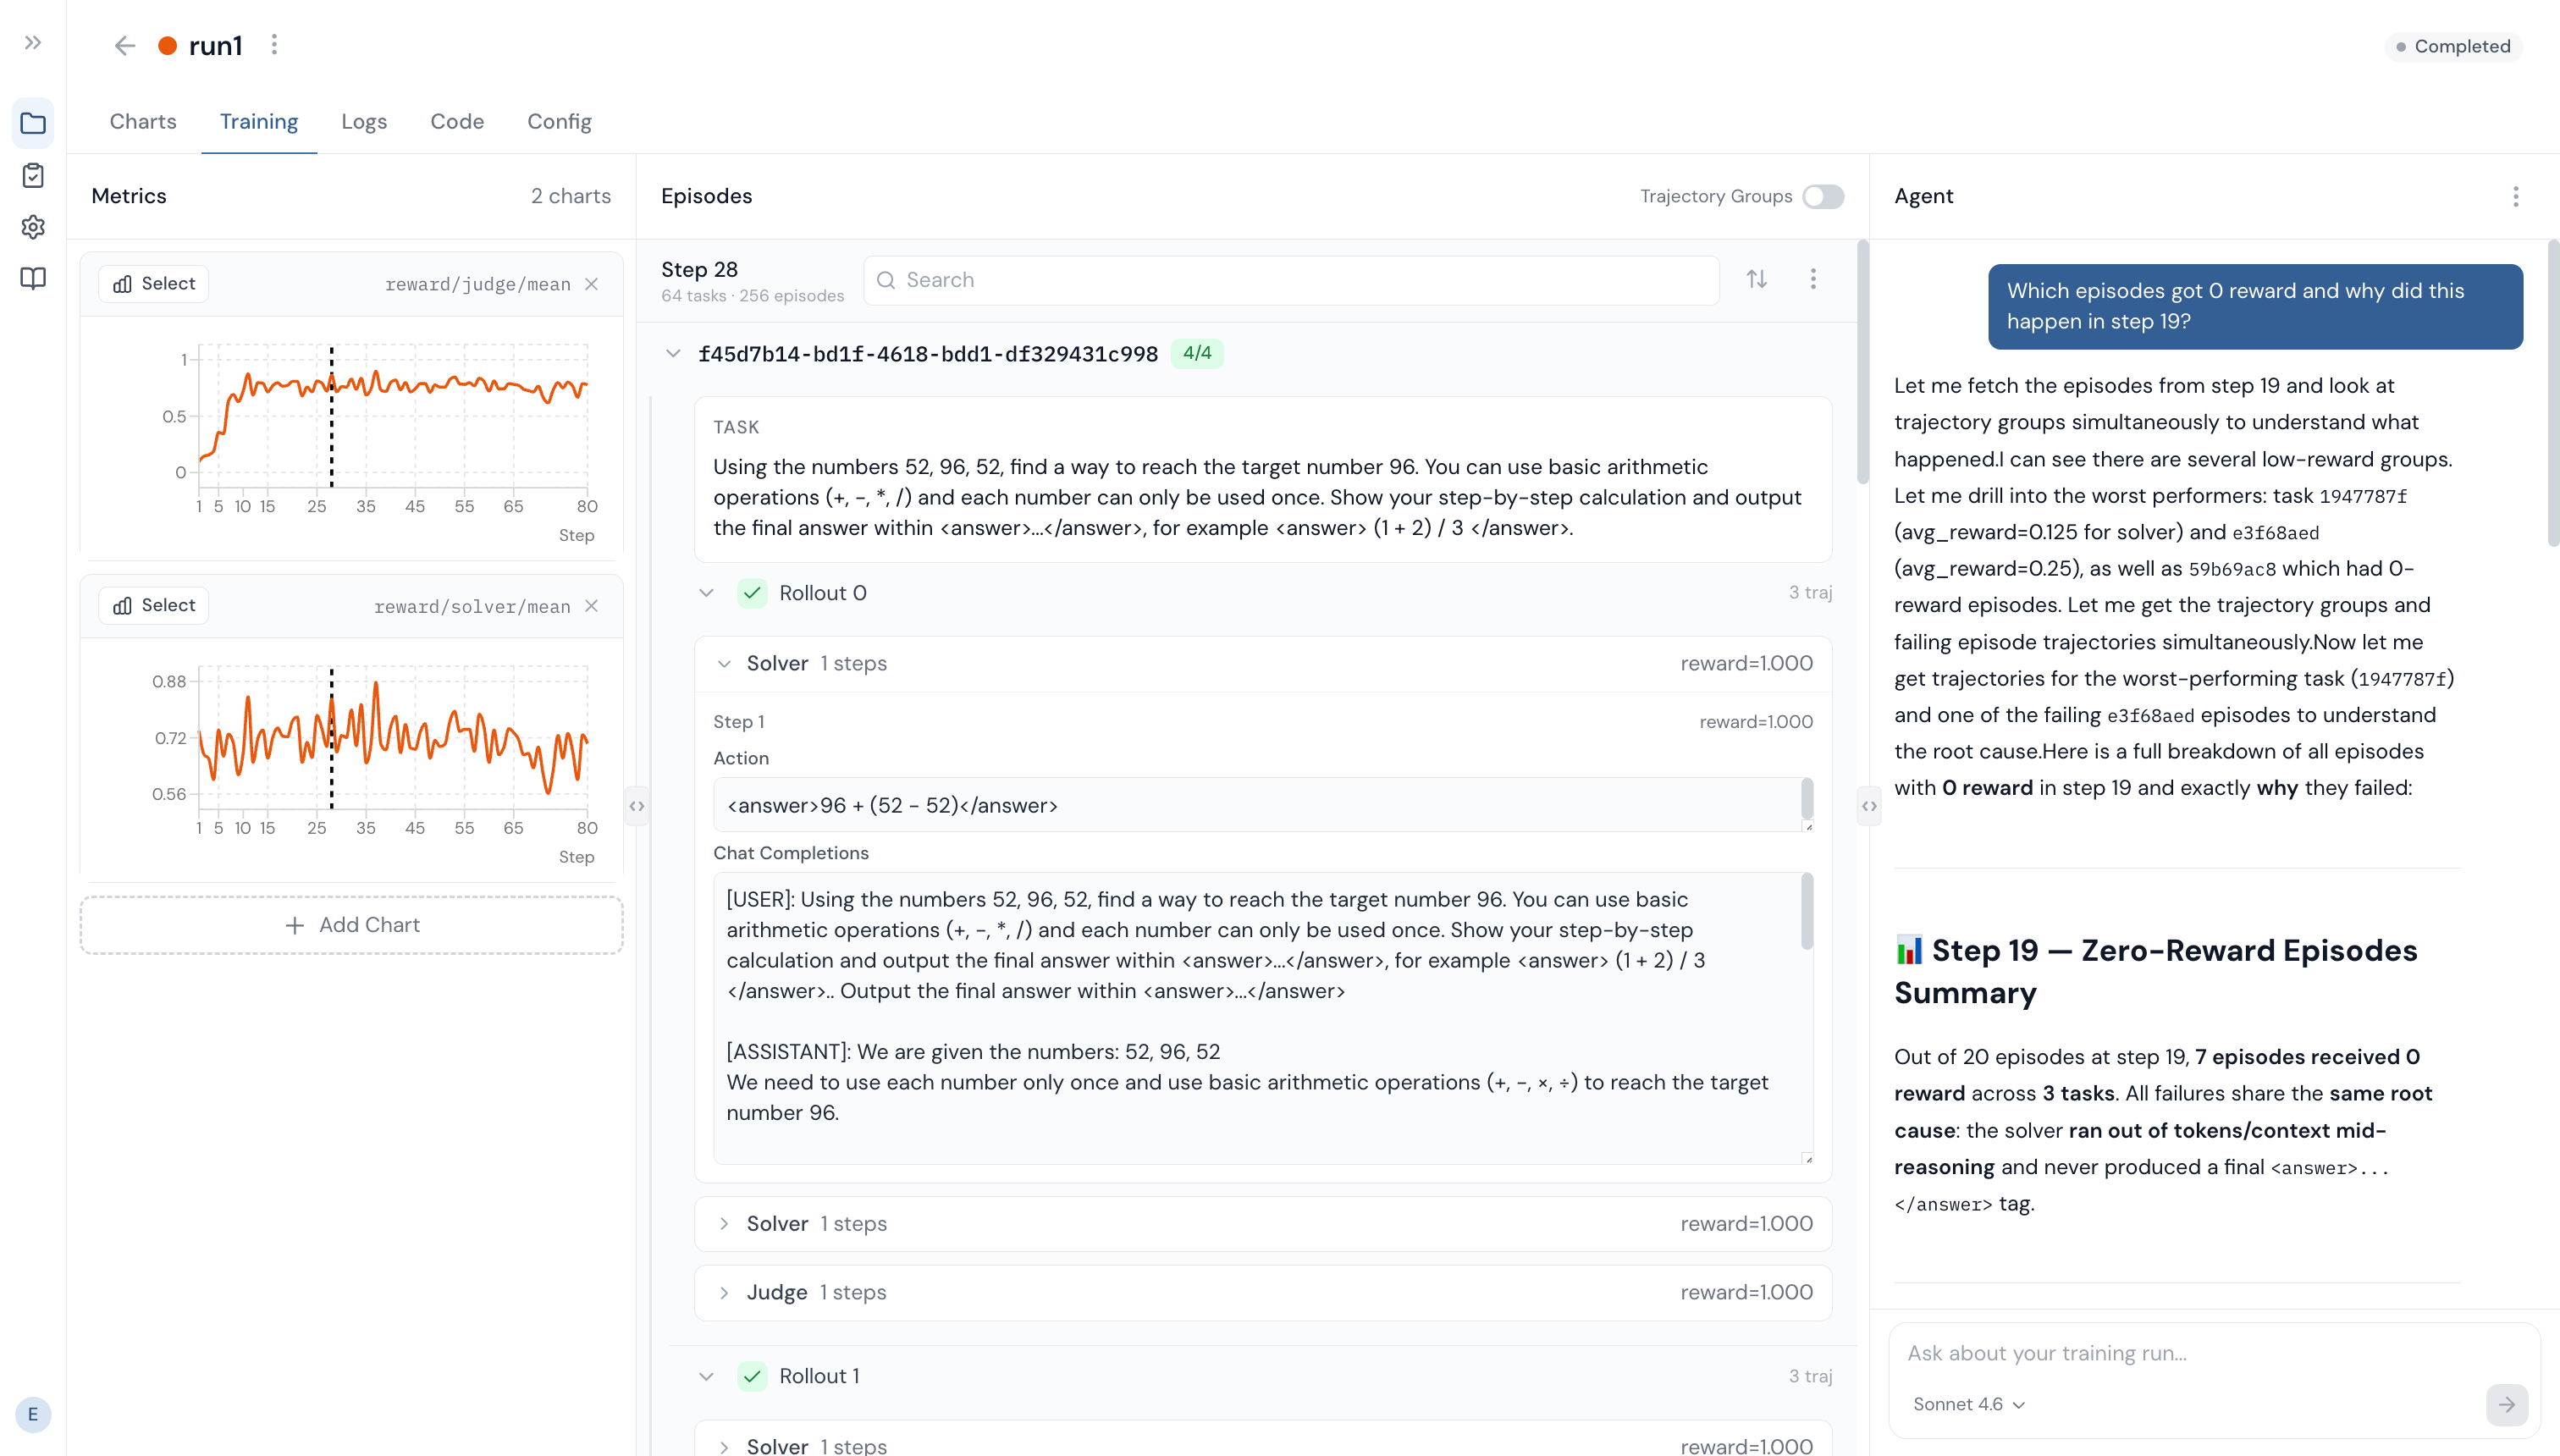
rLLM UI stores sessions, metrics, episodes, trajectories, and logs in a database so they persist across restarts and are searchable.- SQLite (default) — No setup required. A local file (
api/rllm_ui.db) is created on first run. - PostgreSQL — Adds full-text search with stemming and relevance ranking. Set
DATABASE_URLinapi/.env:
Observability AI agent
To enable the agent, set your Anthropic API key inapi/.env:
Configuration
Connecting rLLM to UI
Training runs with script
Regardless of the service (cloud or self-hosted) you use, addui to your trainer’s logger list in your rLLM training script:
Training / Evaluation runs with rLLM CLI
If using our cloud service and rLLM CLI, you can run training and eval runs as such:How it works
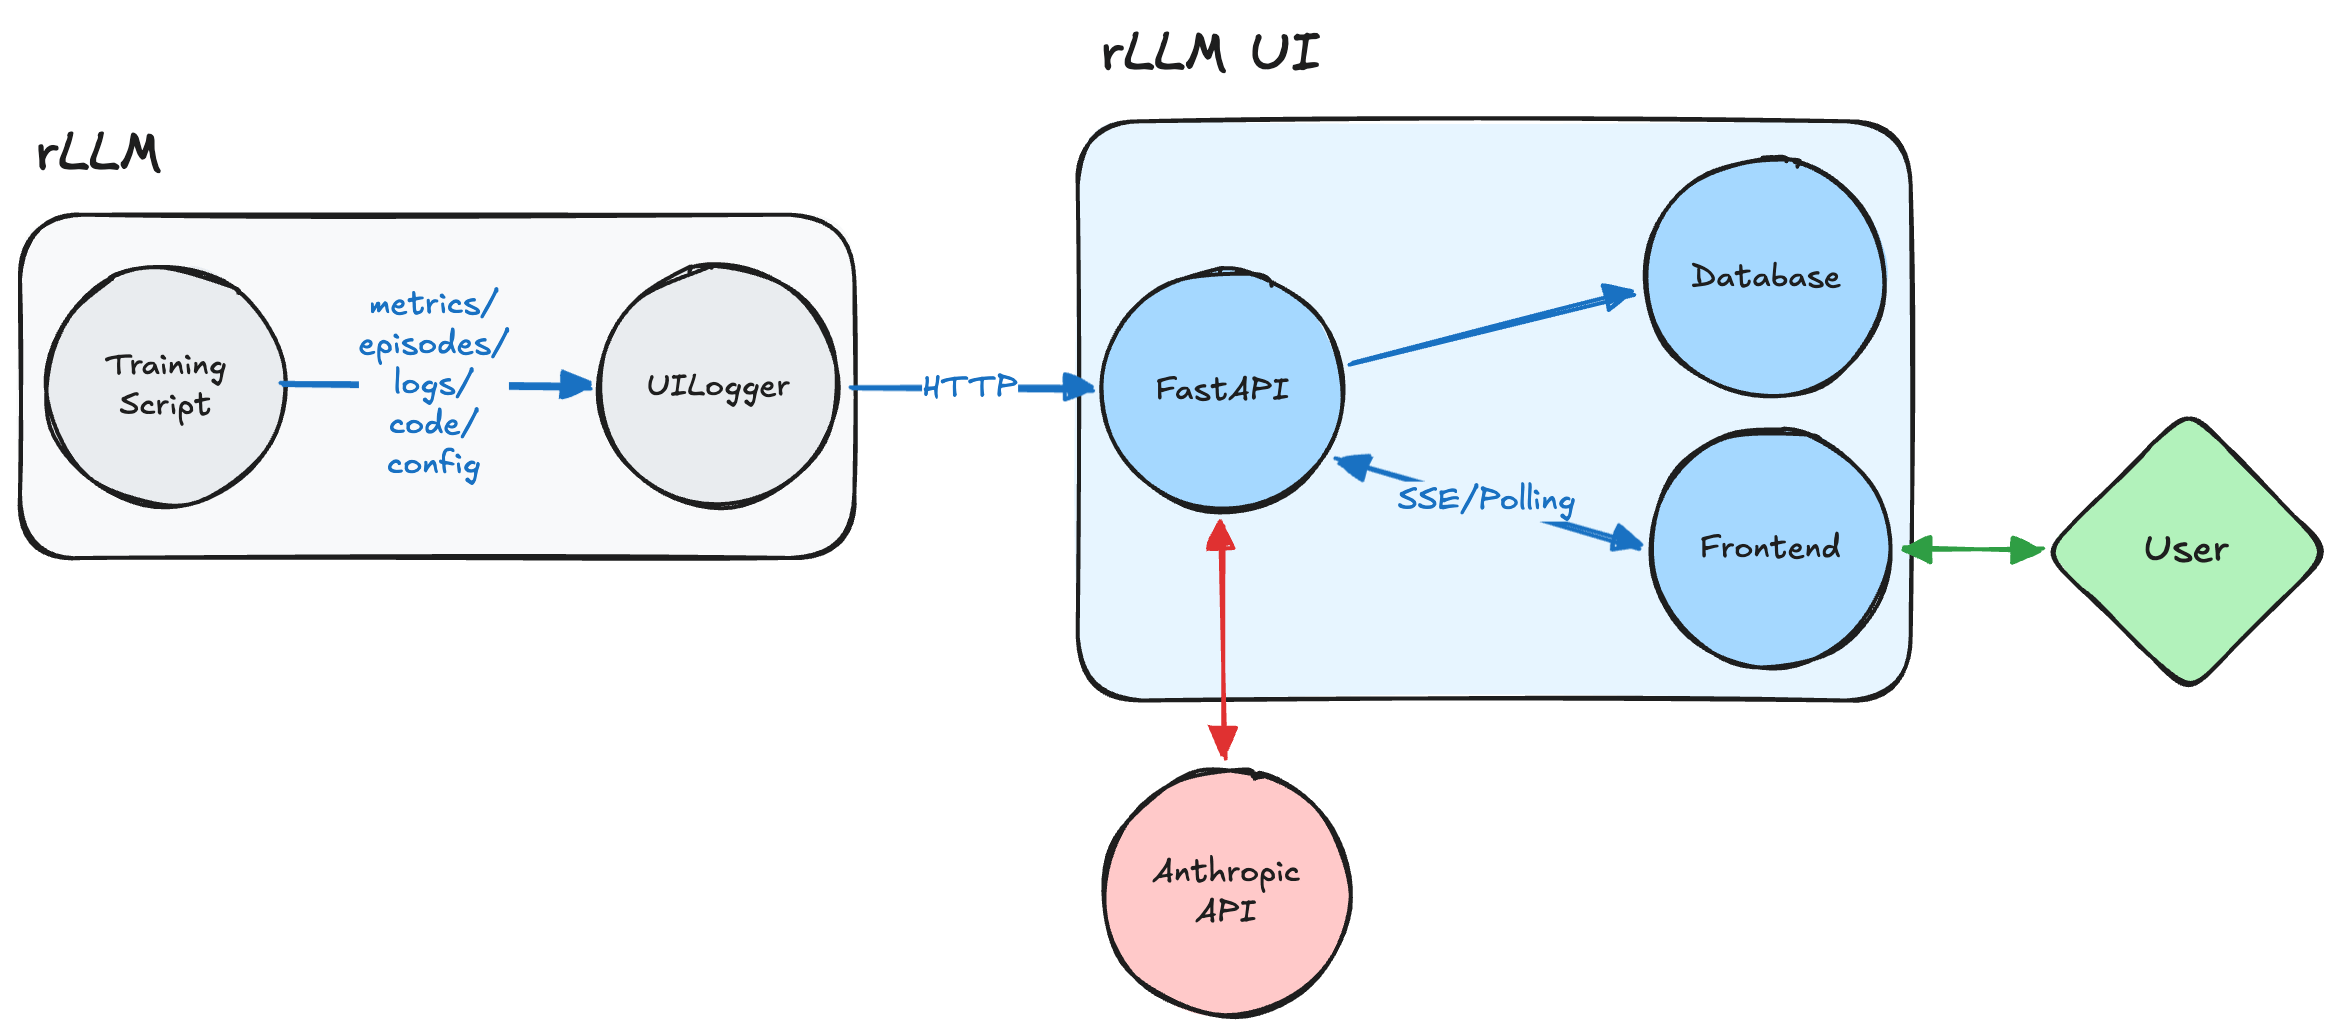
rLLM connects to the UI via theUILogger backend, registered as "ui" in the Tracking class (rllm/utils/tracking.py).
On init, the logger:
- Creates a training session via
POST /api/sessions - Starts a background heartbeat thread (for crash detection)
- Wraps
stdout/stderrwithTeeStreamto capture training logs